Build Your First AI Chatbot
Ready to automate your customer support? In this guide, you'll create, train, and deploy your first VerlyAI agent.
Pre-requisites
- A VerlyAI account (Sign up here)
- Content to train your bot (Website URL, PDF, or text)
Step 1: Create a New Agent
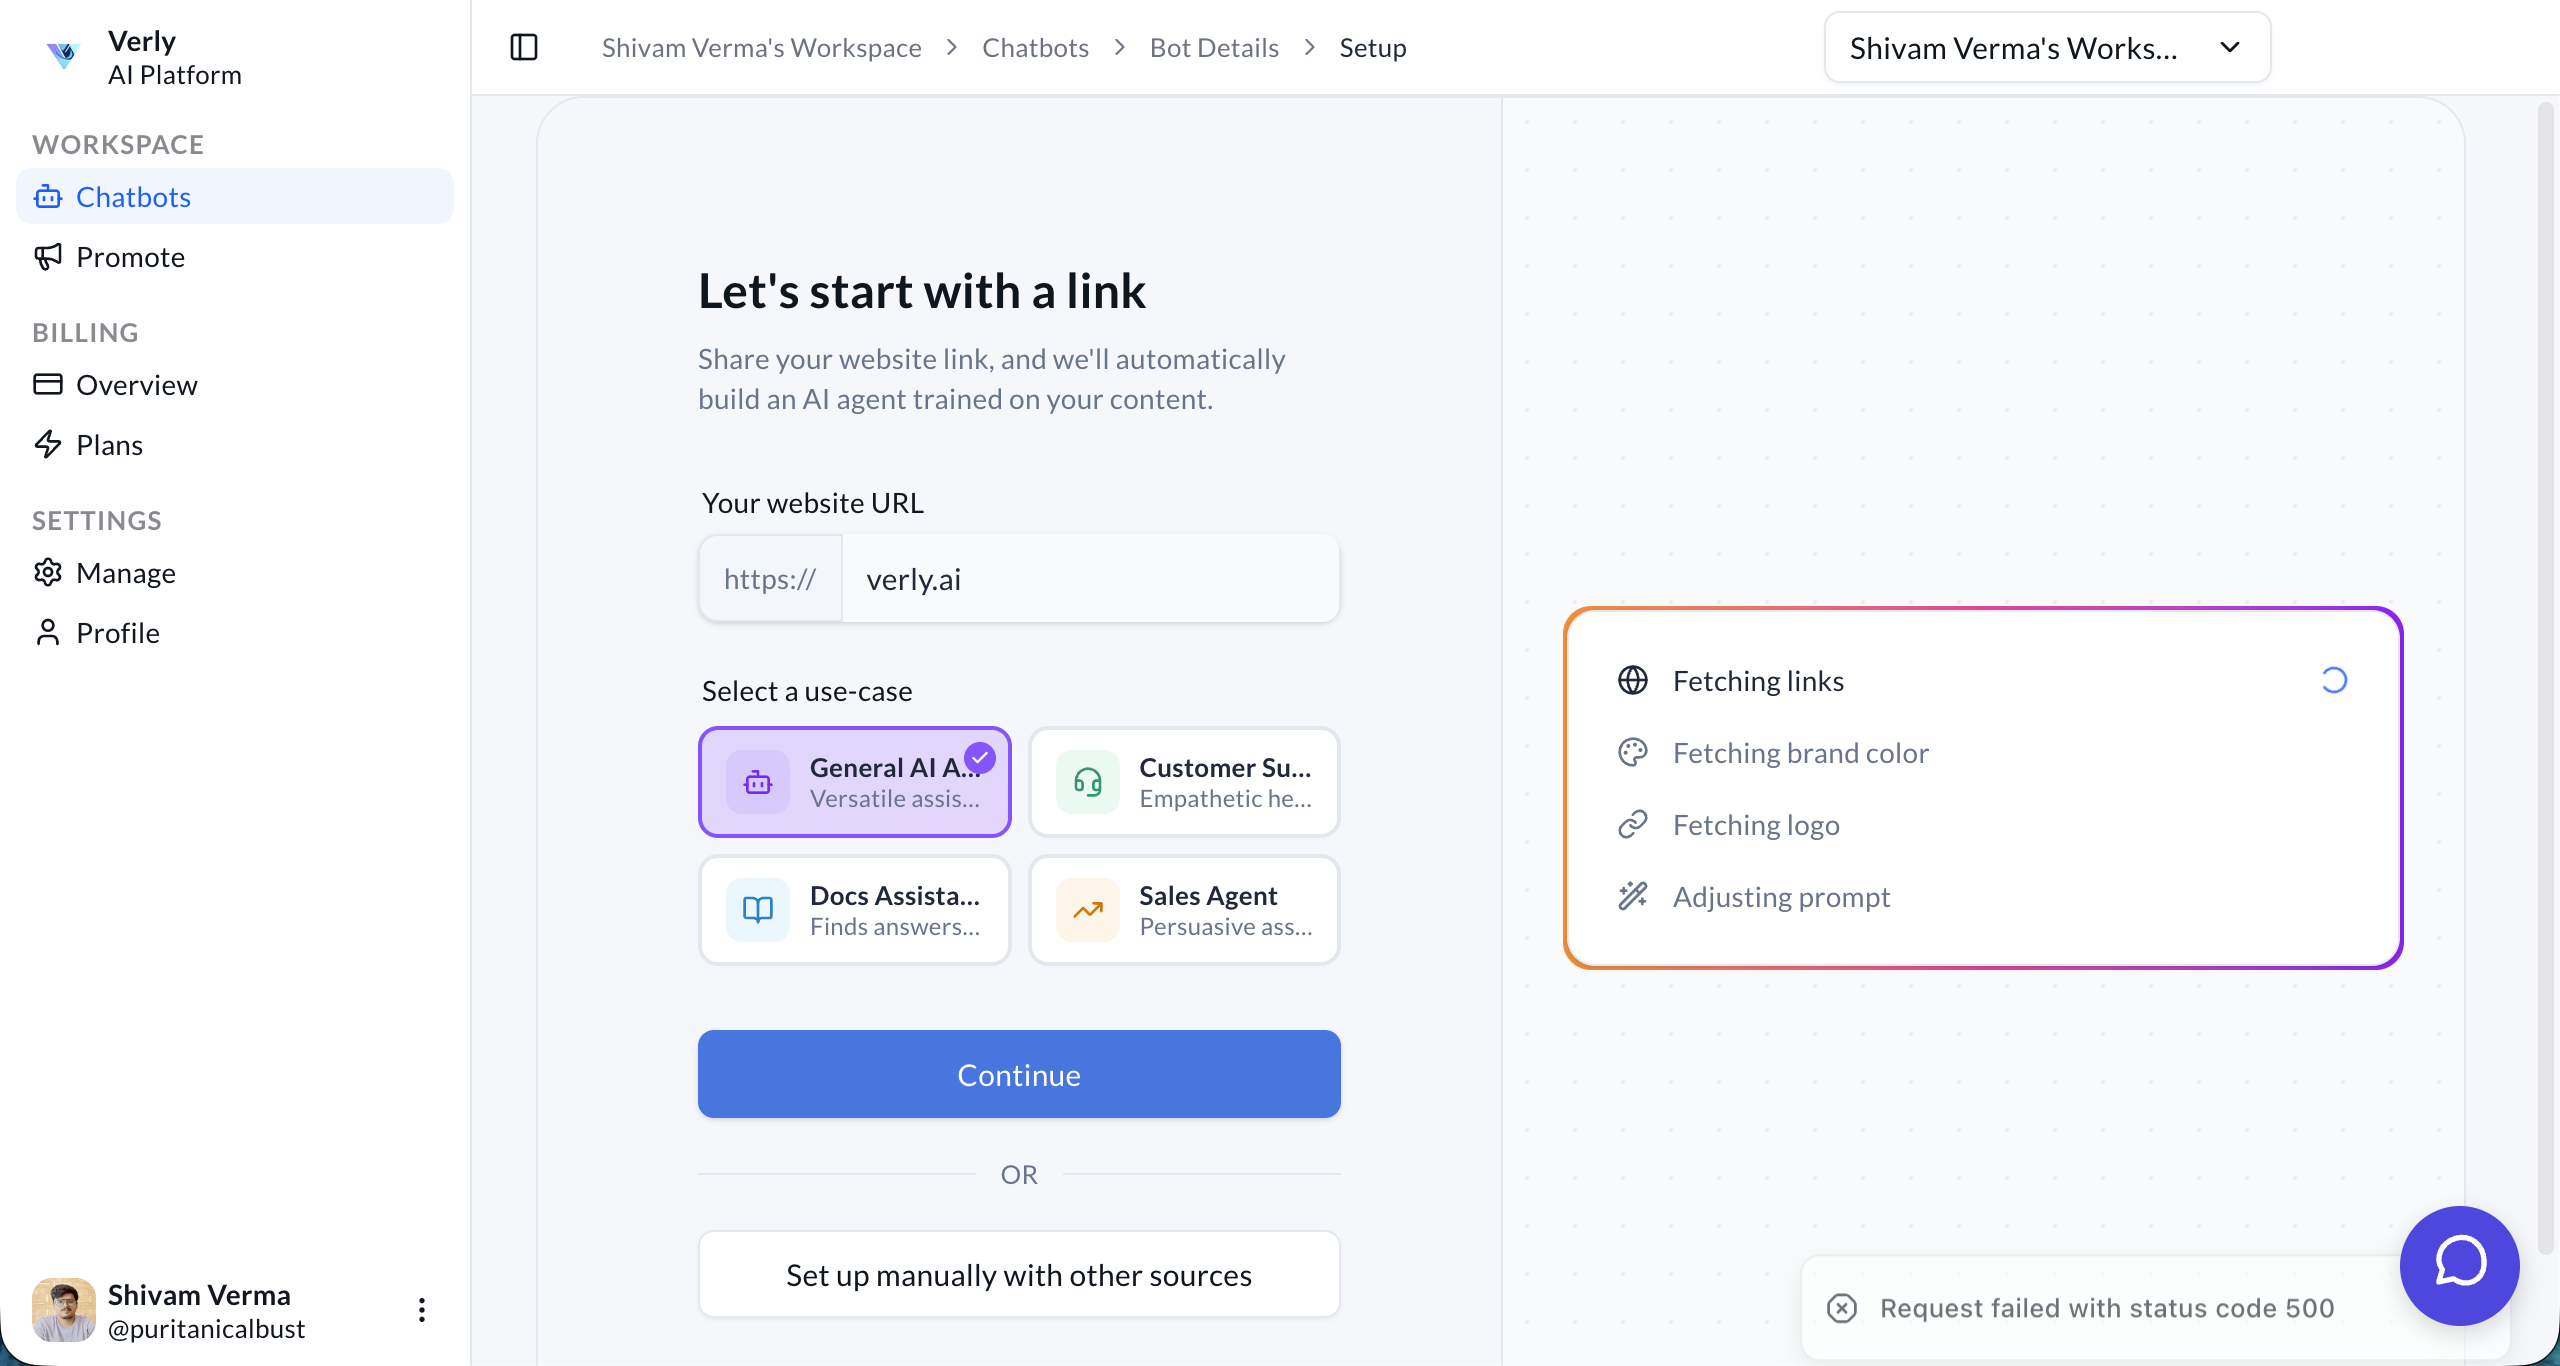
Navigate to the Agent Builder in your dashboard and click Create New Agent.
Give your agent a name (e.g., "Support Bot") and define its Persona and System Prompt.
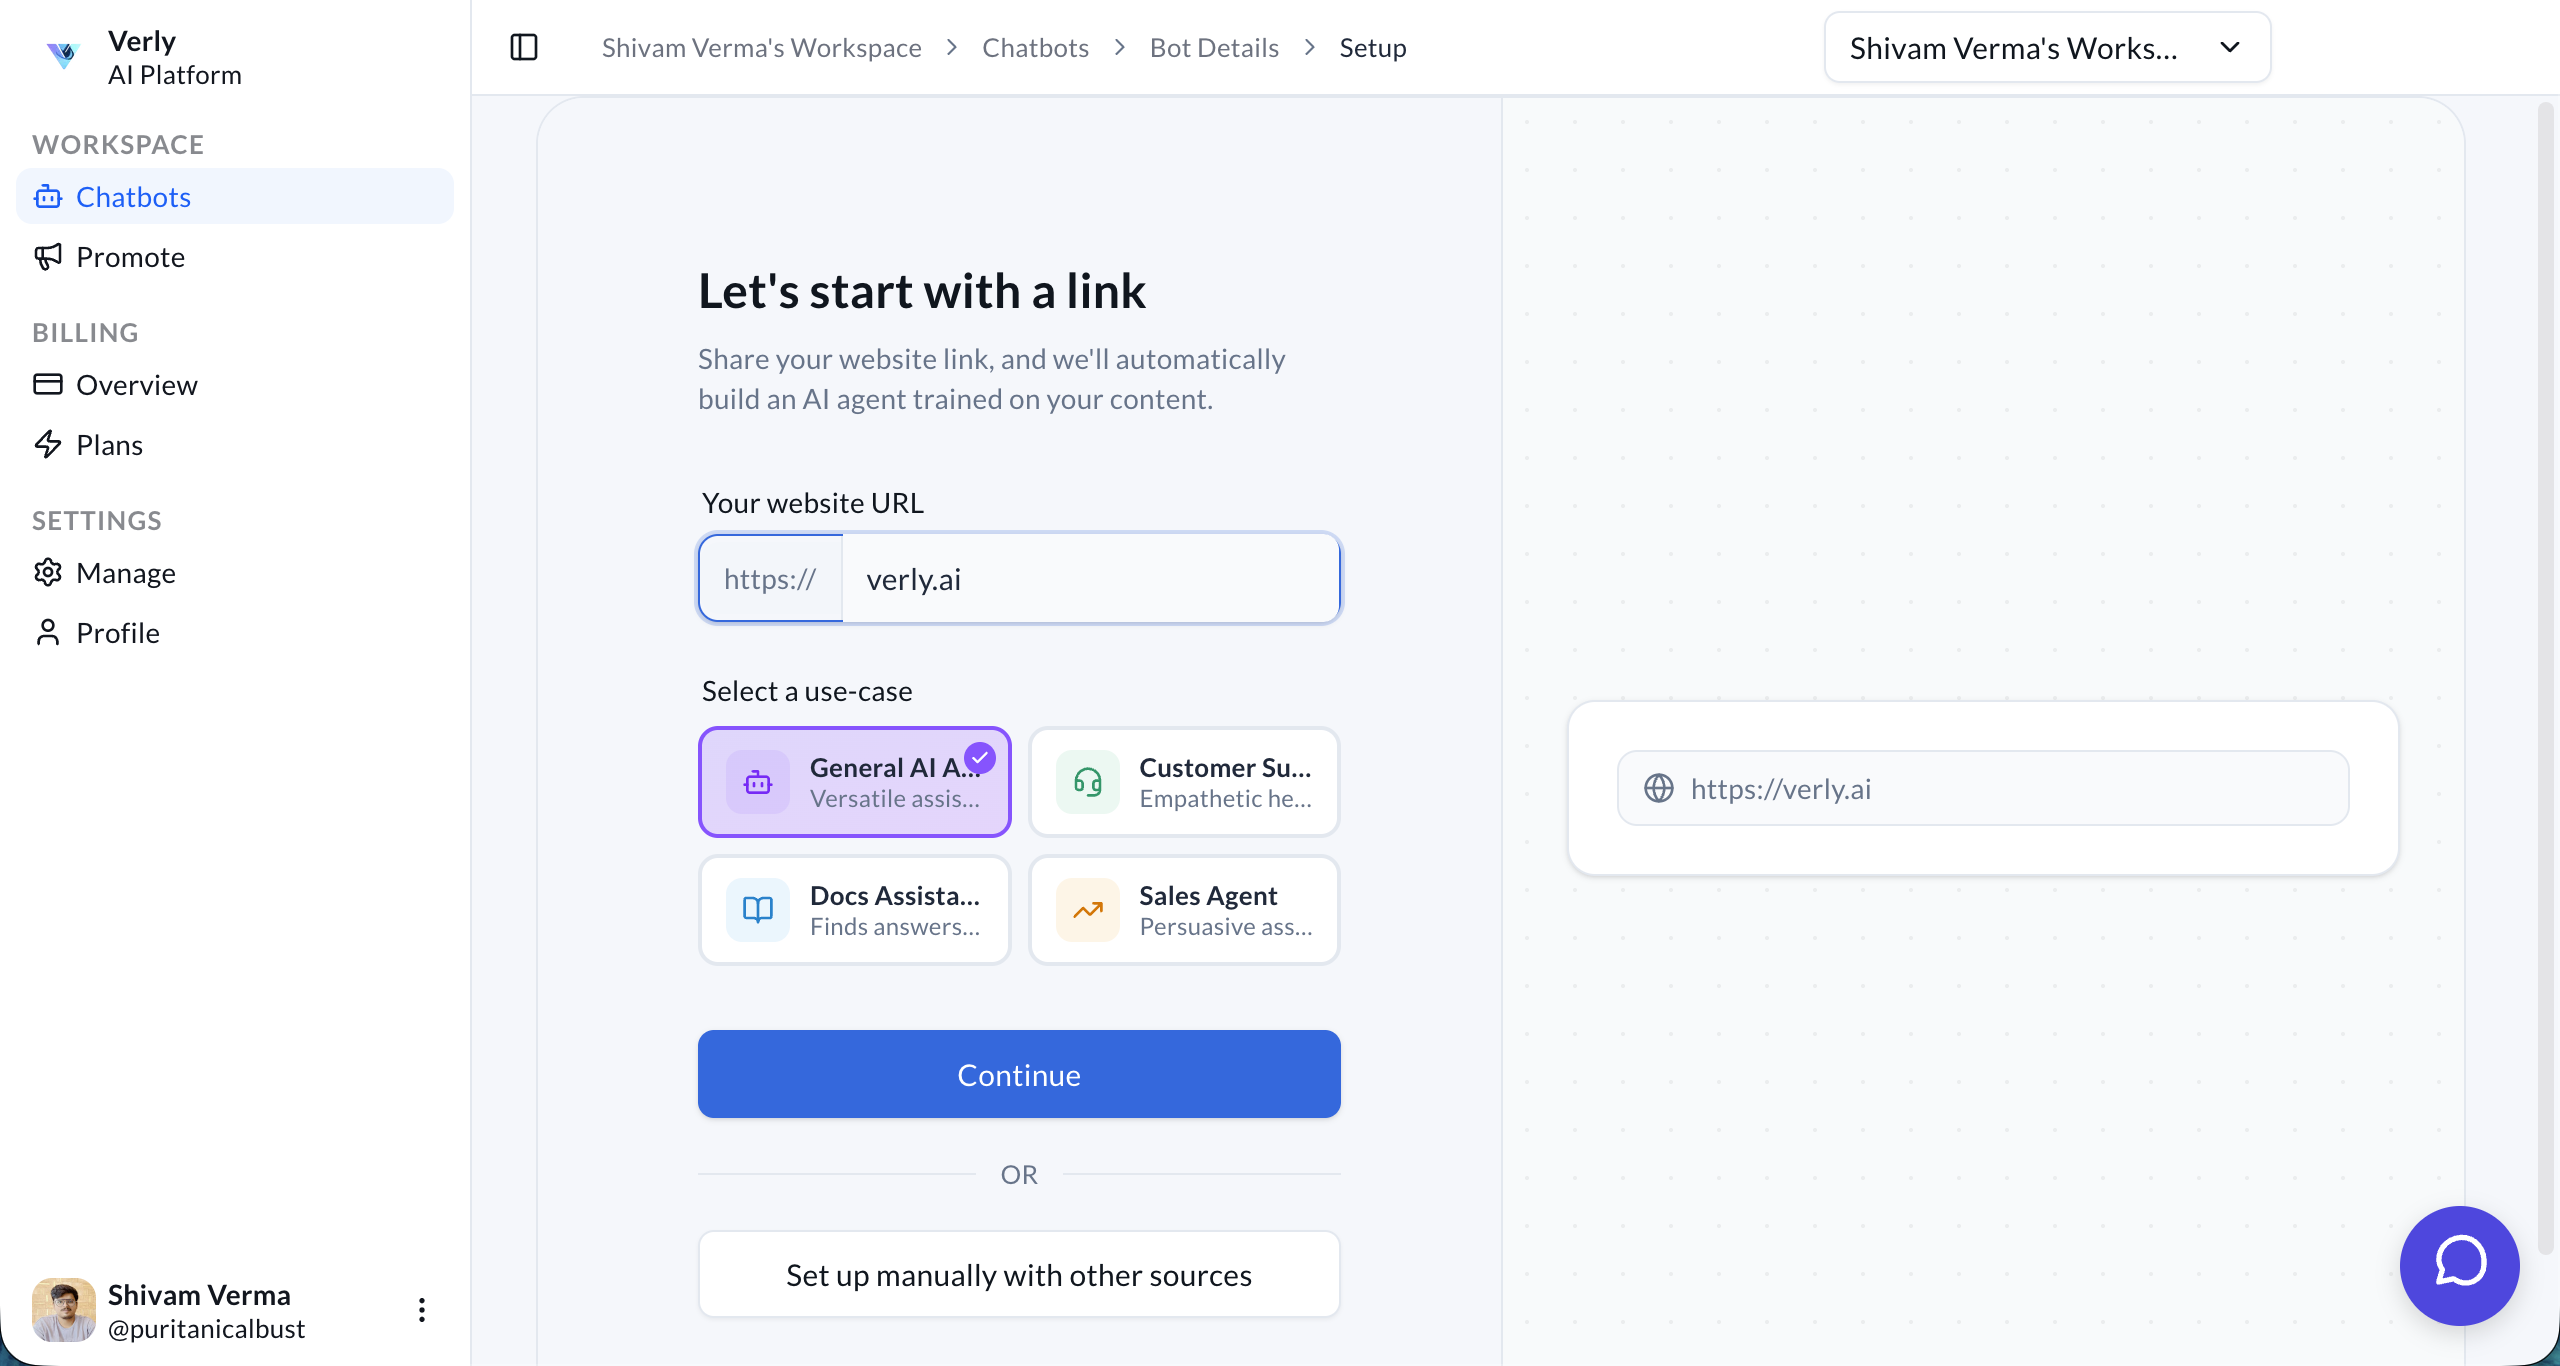
Choose Agent Type
Click on the Continue to Agent Builder button. You can choose from four specialized agent types:
- General AI Agent: A versatile assistant for any task.
- Customer Support: Optimized for resolving queries and handling tickets.
- Docs Assistant: Best for searching through technical documentation.
- Sales Agent: Designed to qualify leads and drive conversions.
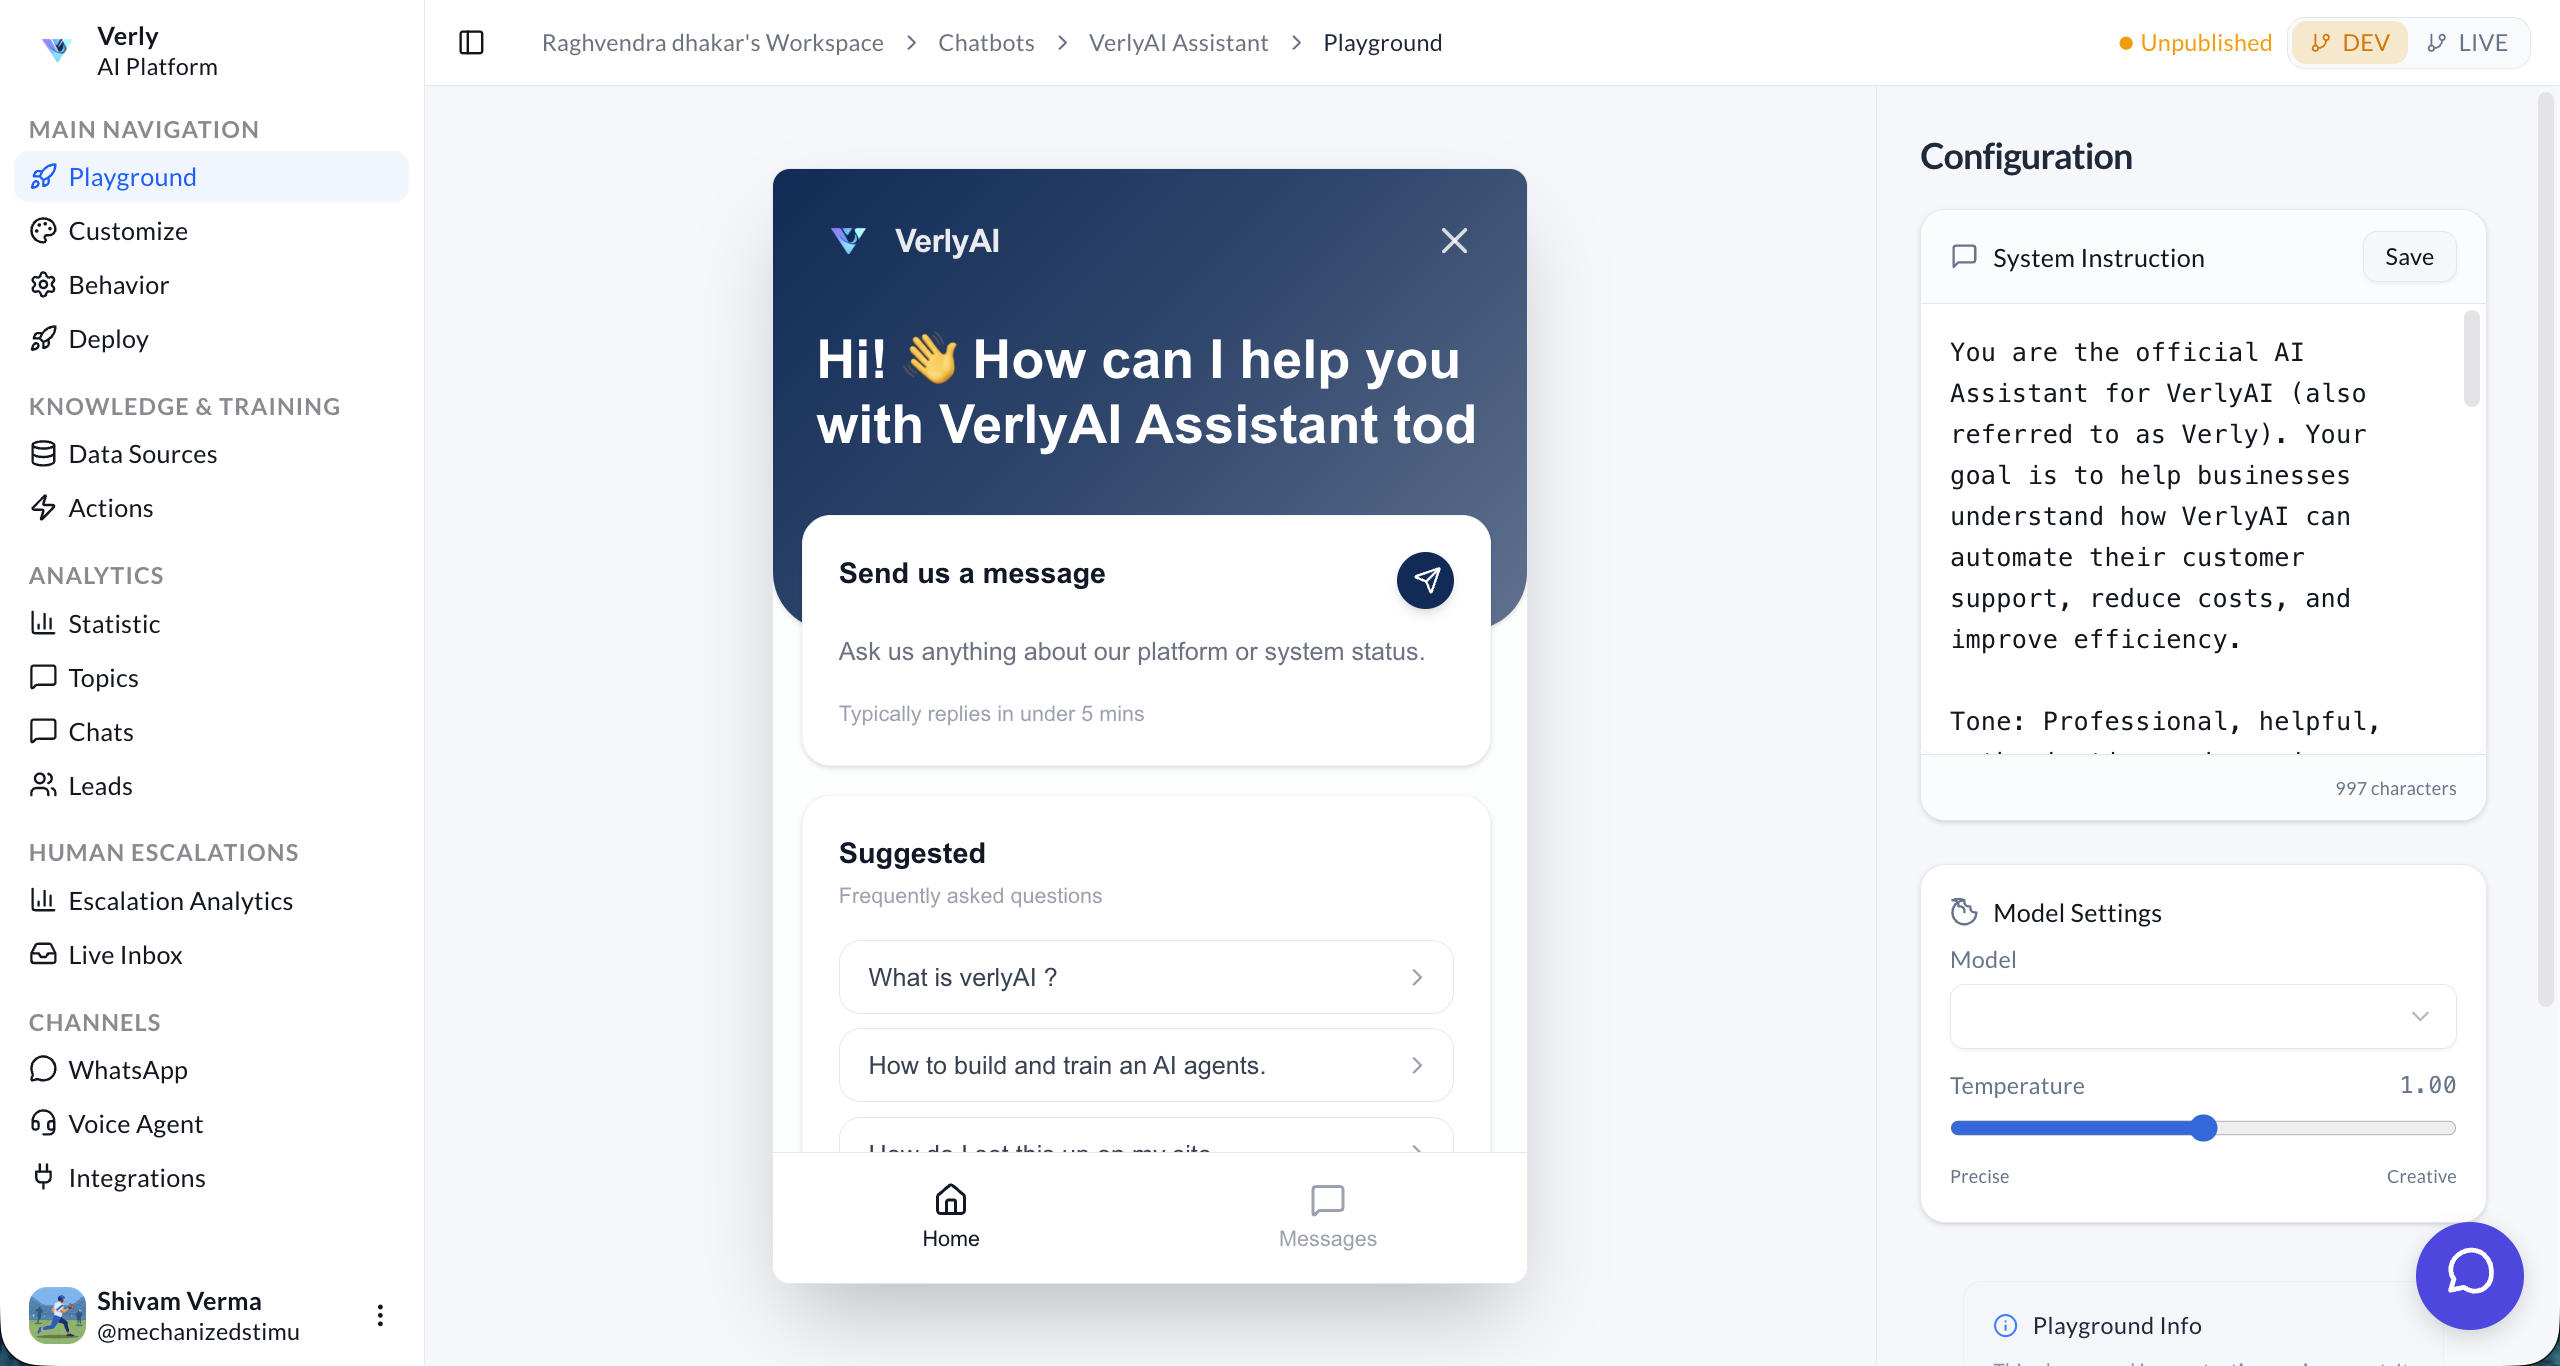
Once selected, you'll be taken to your new agent's dashboard where you can manage its settings, knowledge base, and deployment.
Agent Dashboard
Here is the final dashboard for a General AI Agent.
Step 2: Add Knowledge Sources
Your agent needs specific knowledge about your business to answer questions accurately.
1. Go to Data Sources
Navigate to the Data Sources tab in your agent's dashboard.
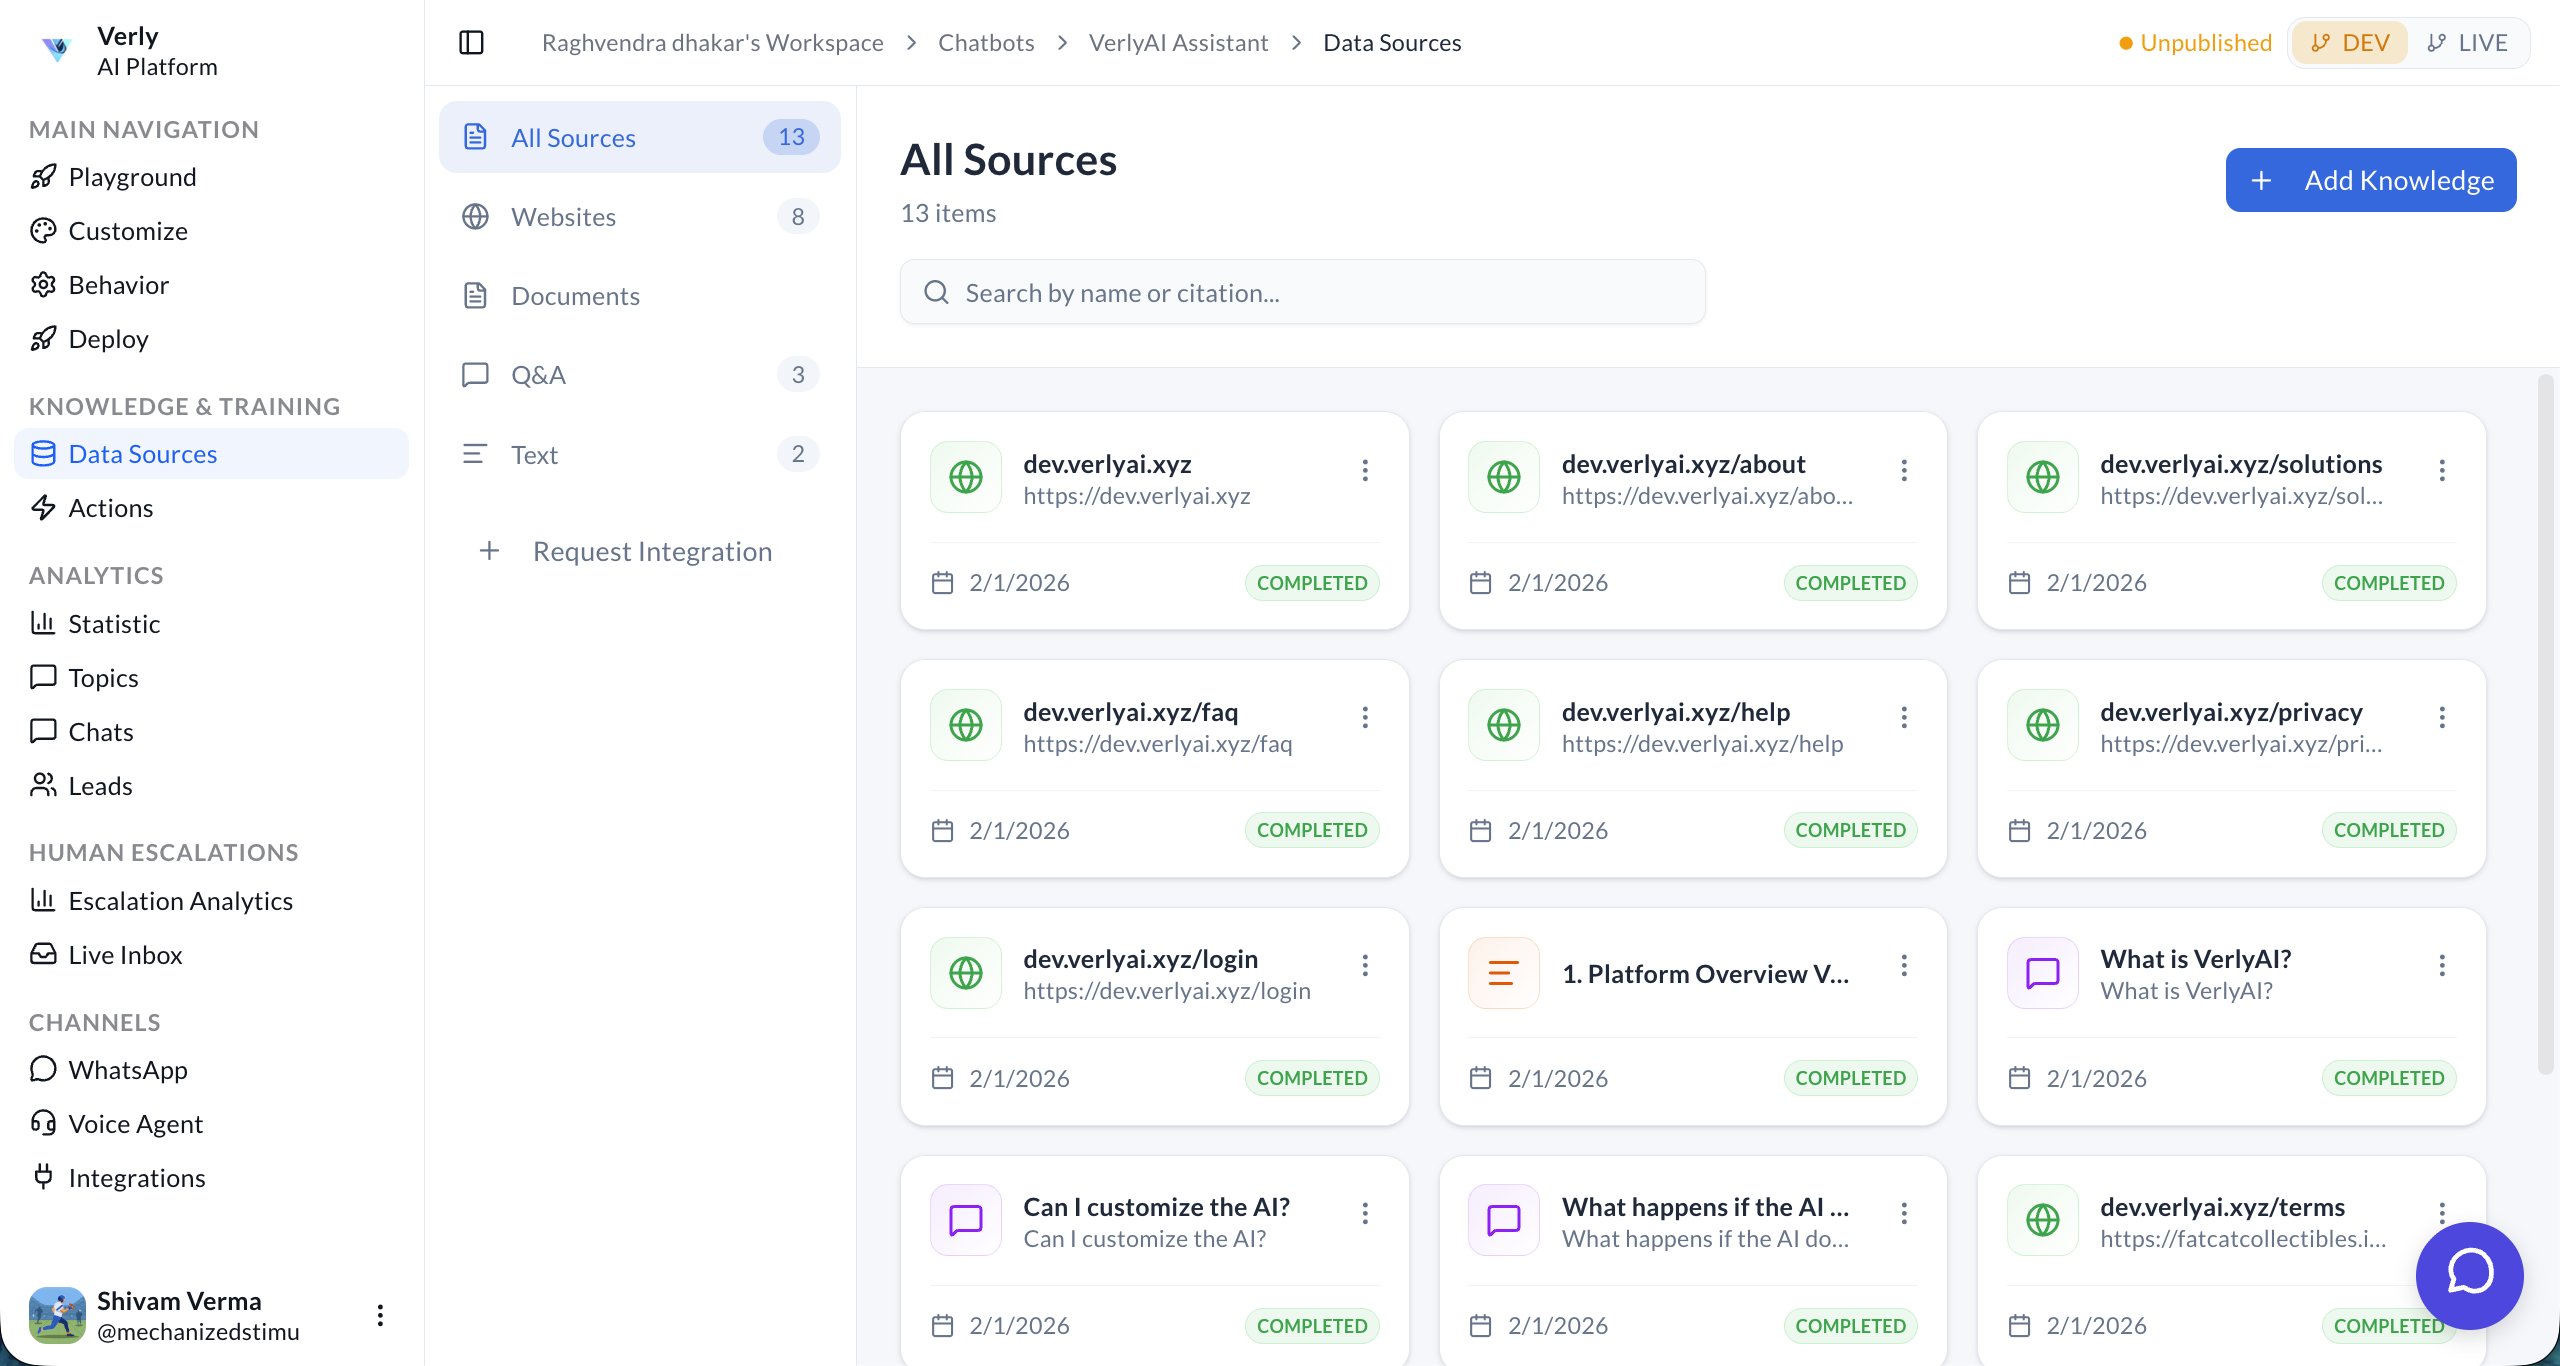
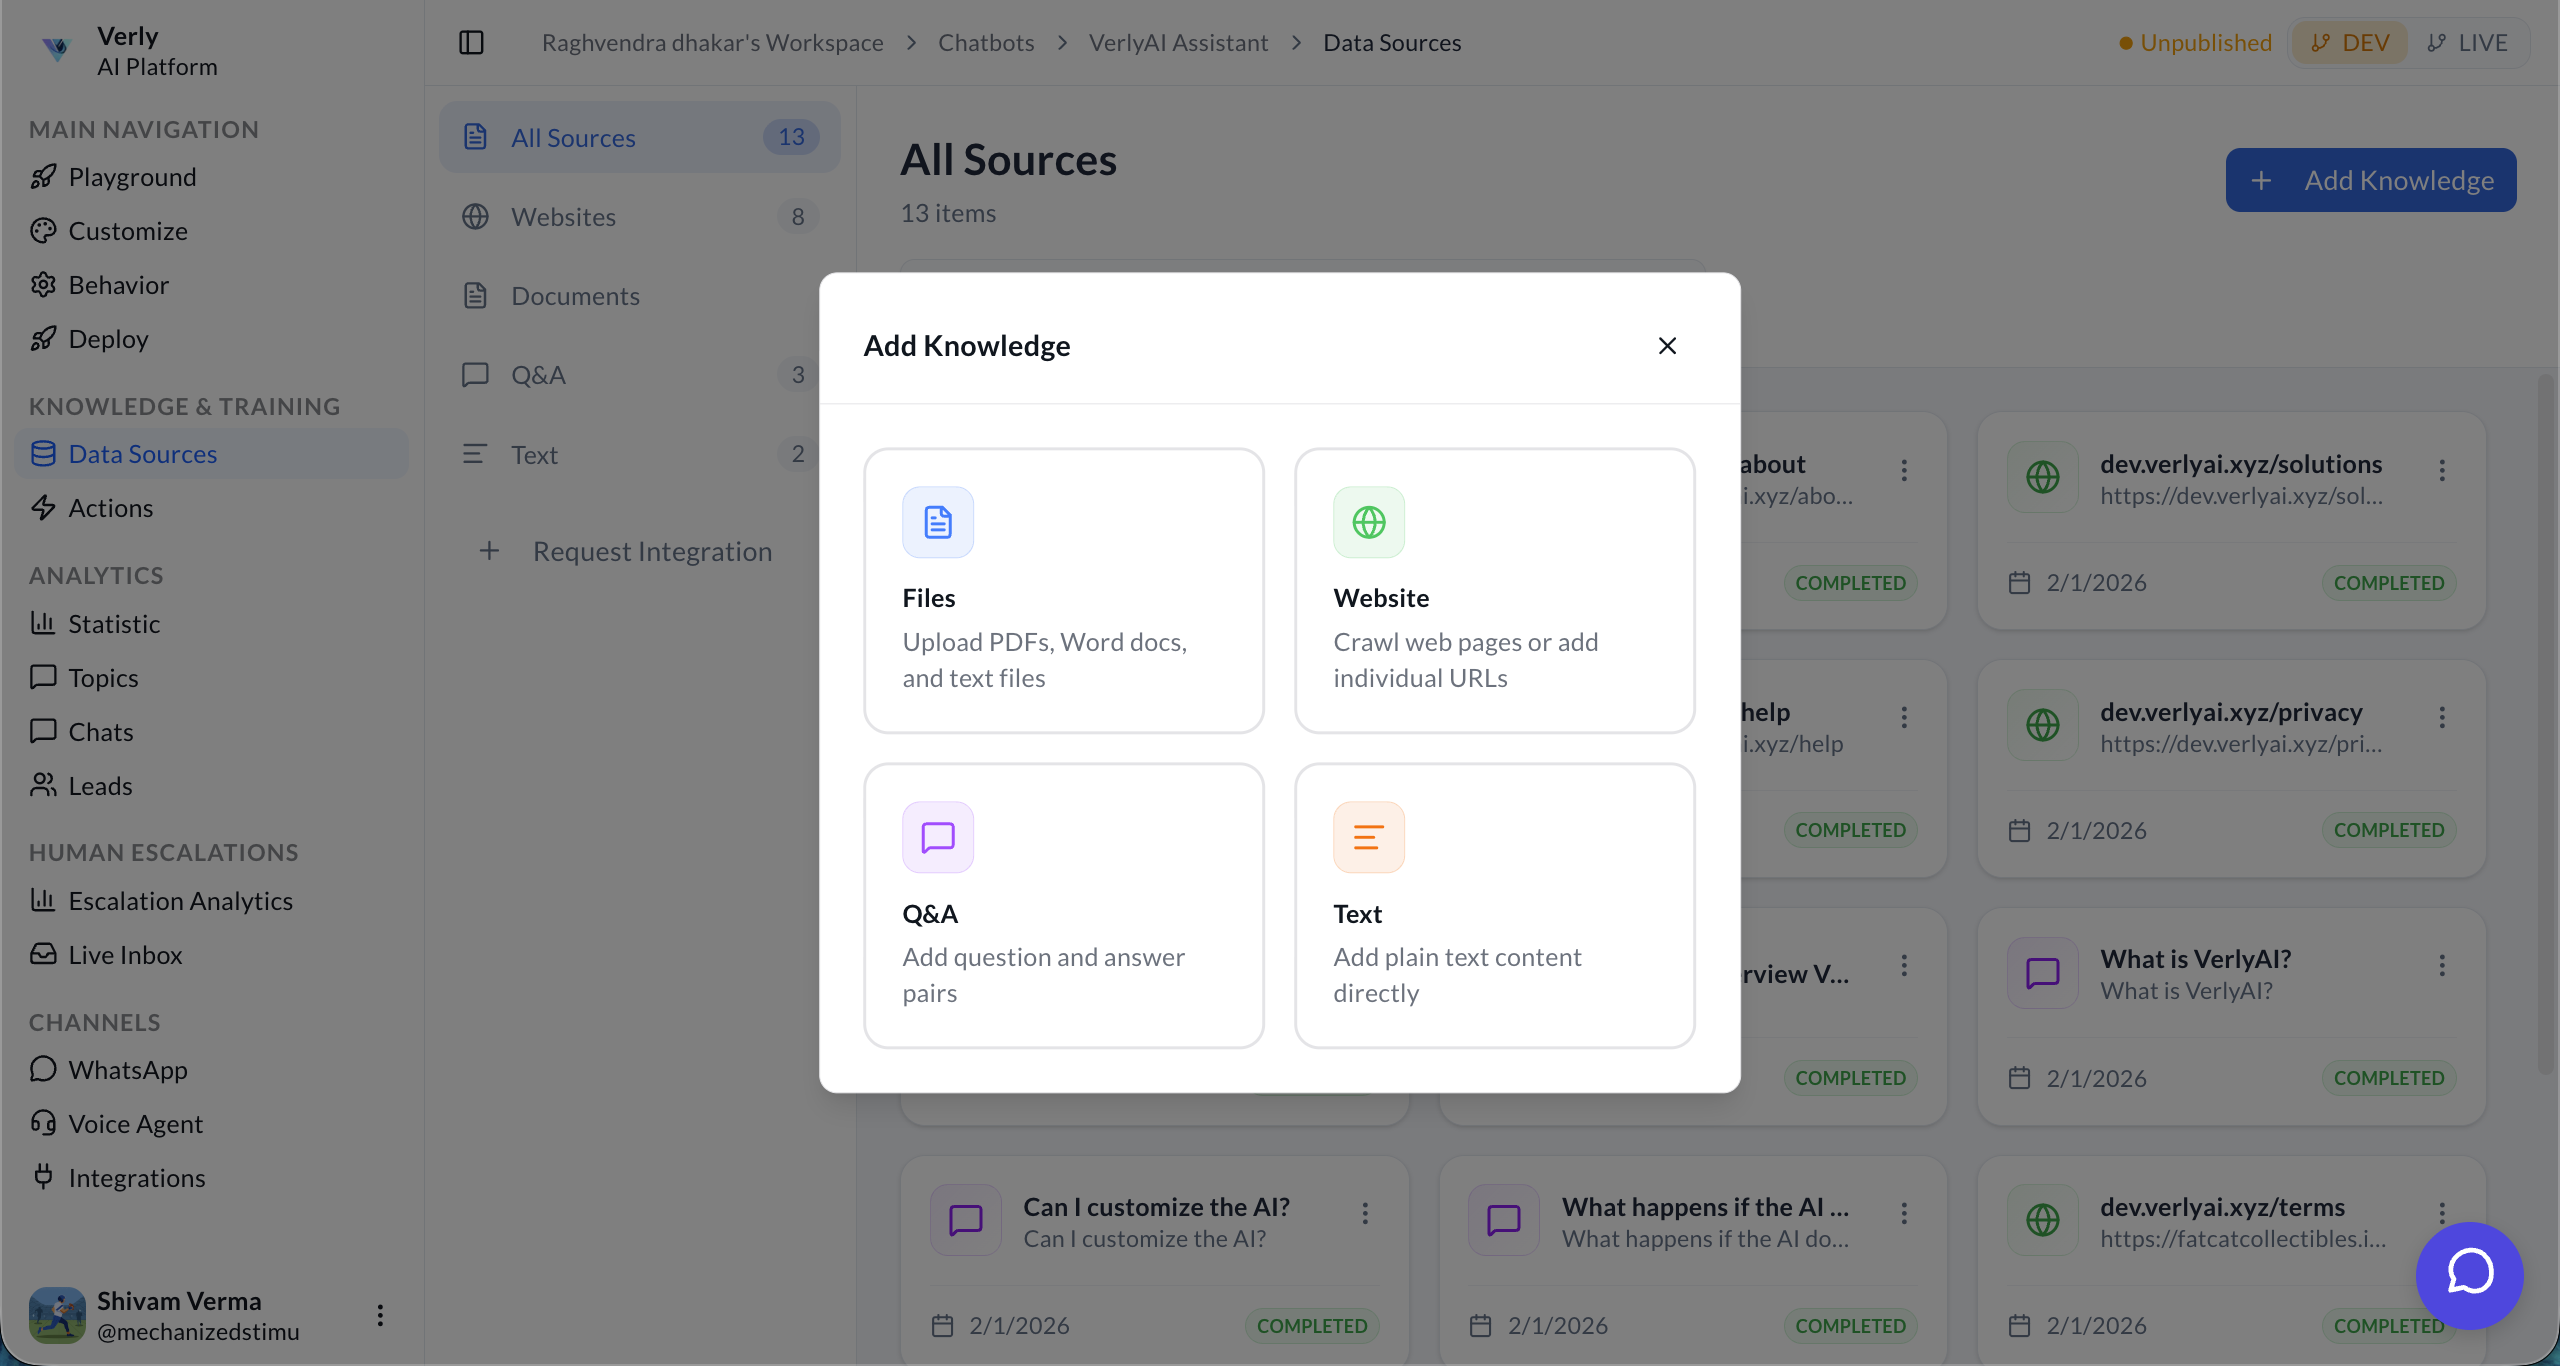
2. Add Data Sources
Click on the Add Data Sources button. You can add knowledge sources using four different methods:
- Websites: Crawl your website to extract information.
- Documents: Upload files like PDFs, DOCX, or TXT.
- Q&A: Manually add Frequently Asked Questions.
- Text: Paste raw text content directly.
3. Upload Documents
Select the Documents option to upload your files. This is the most common way to train your agent on existing materials.
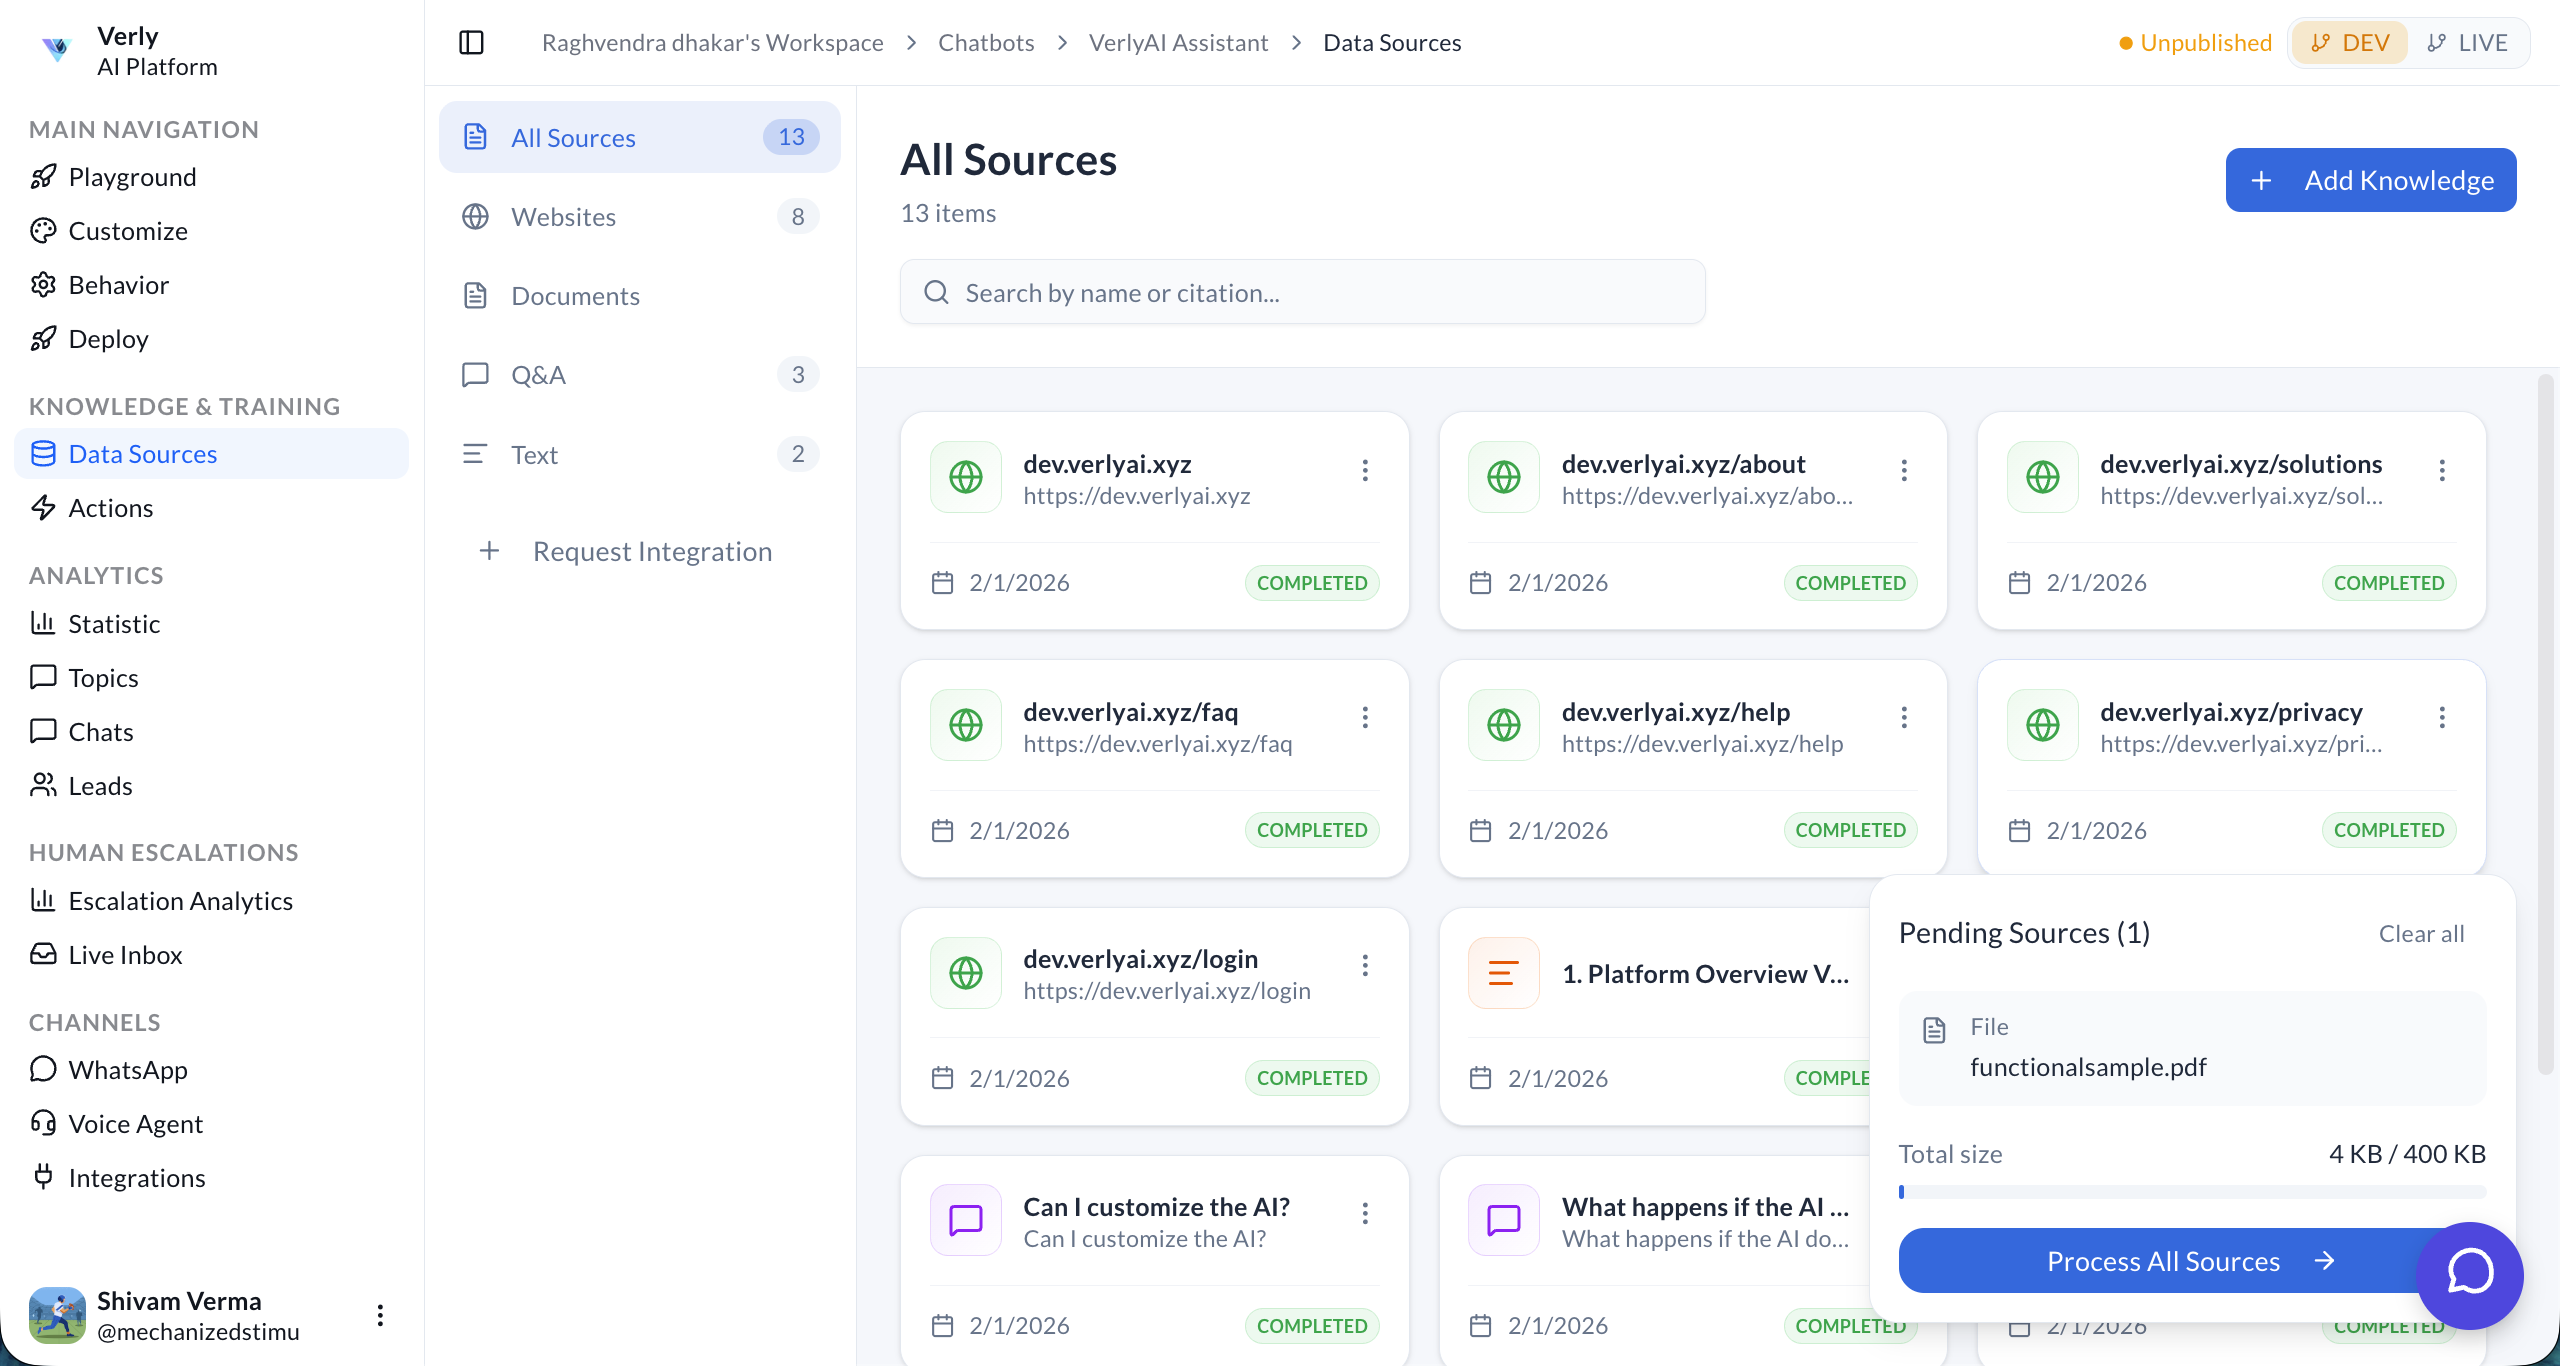
VerlyAI's engine will index your content, making it instantly searchable by the agent.
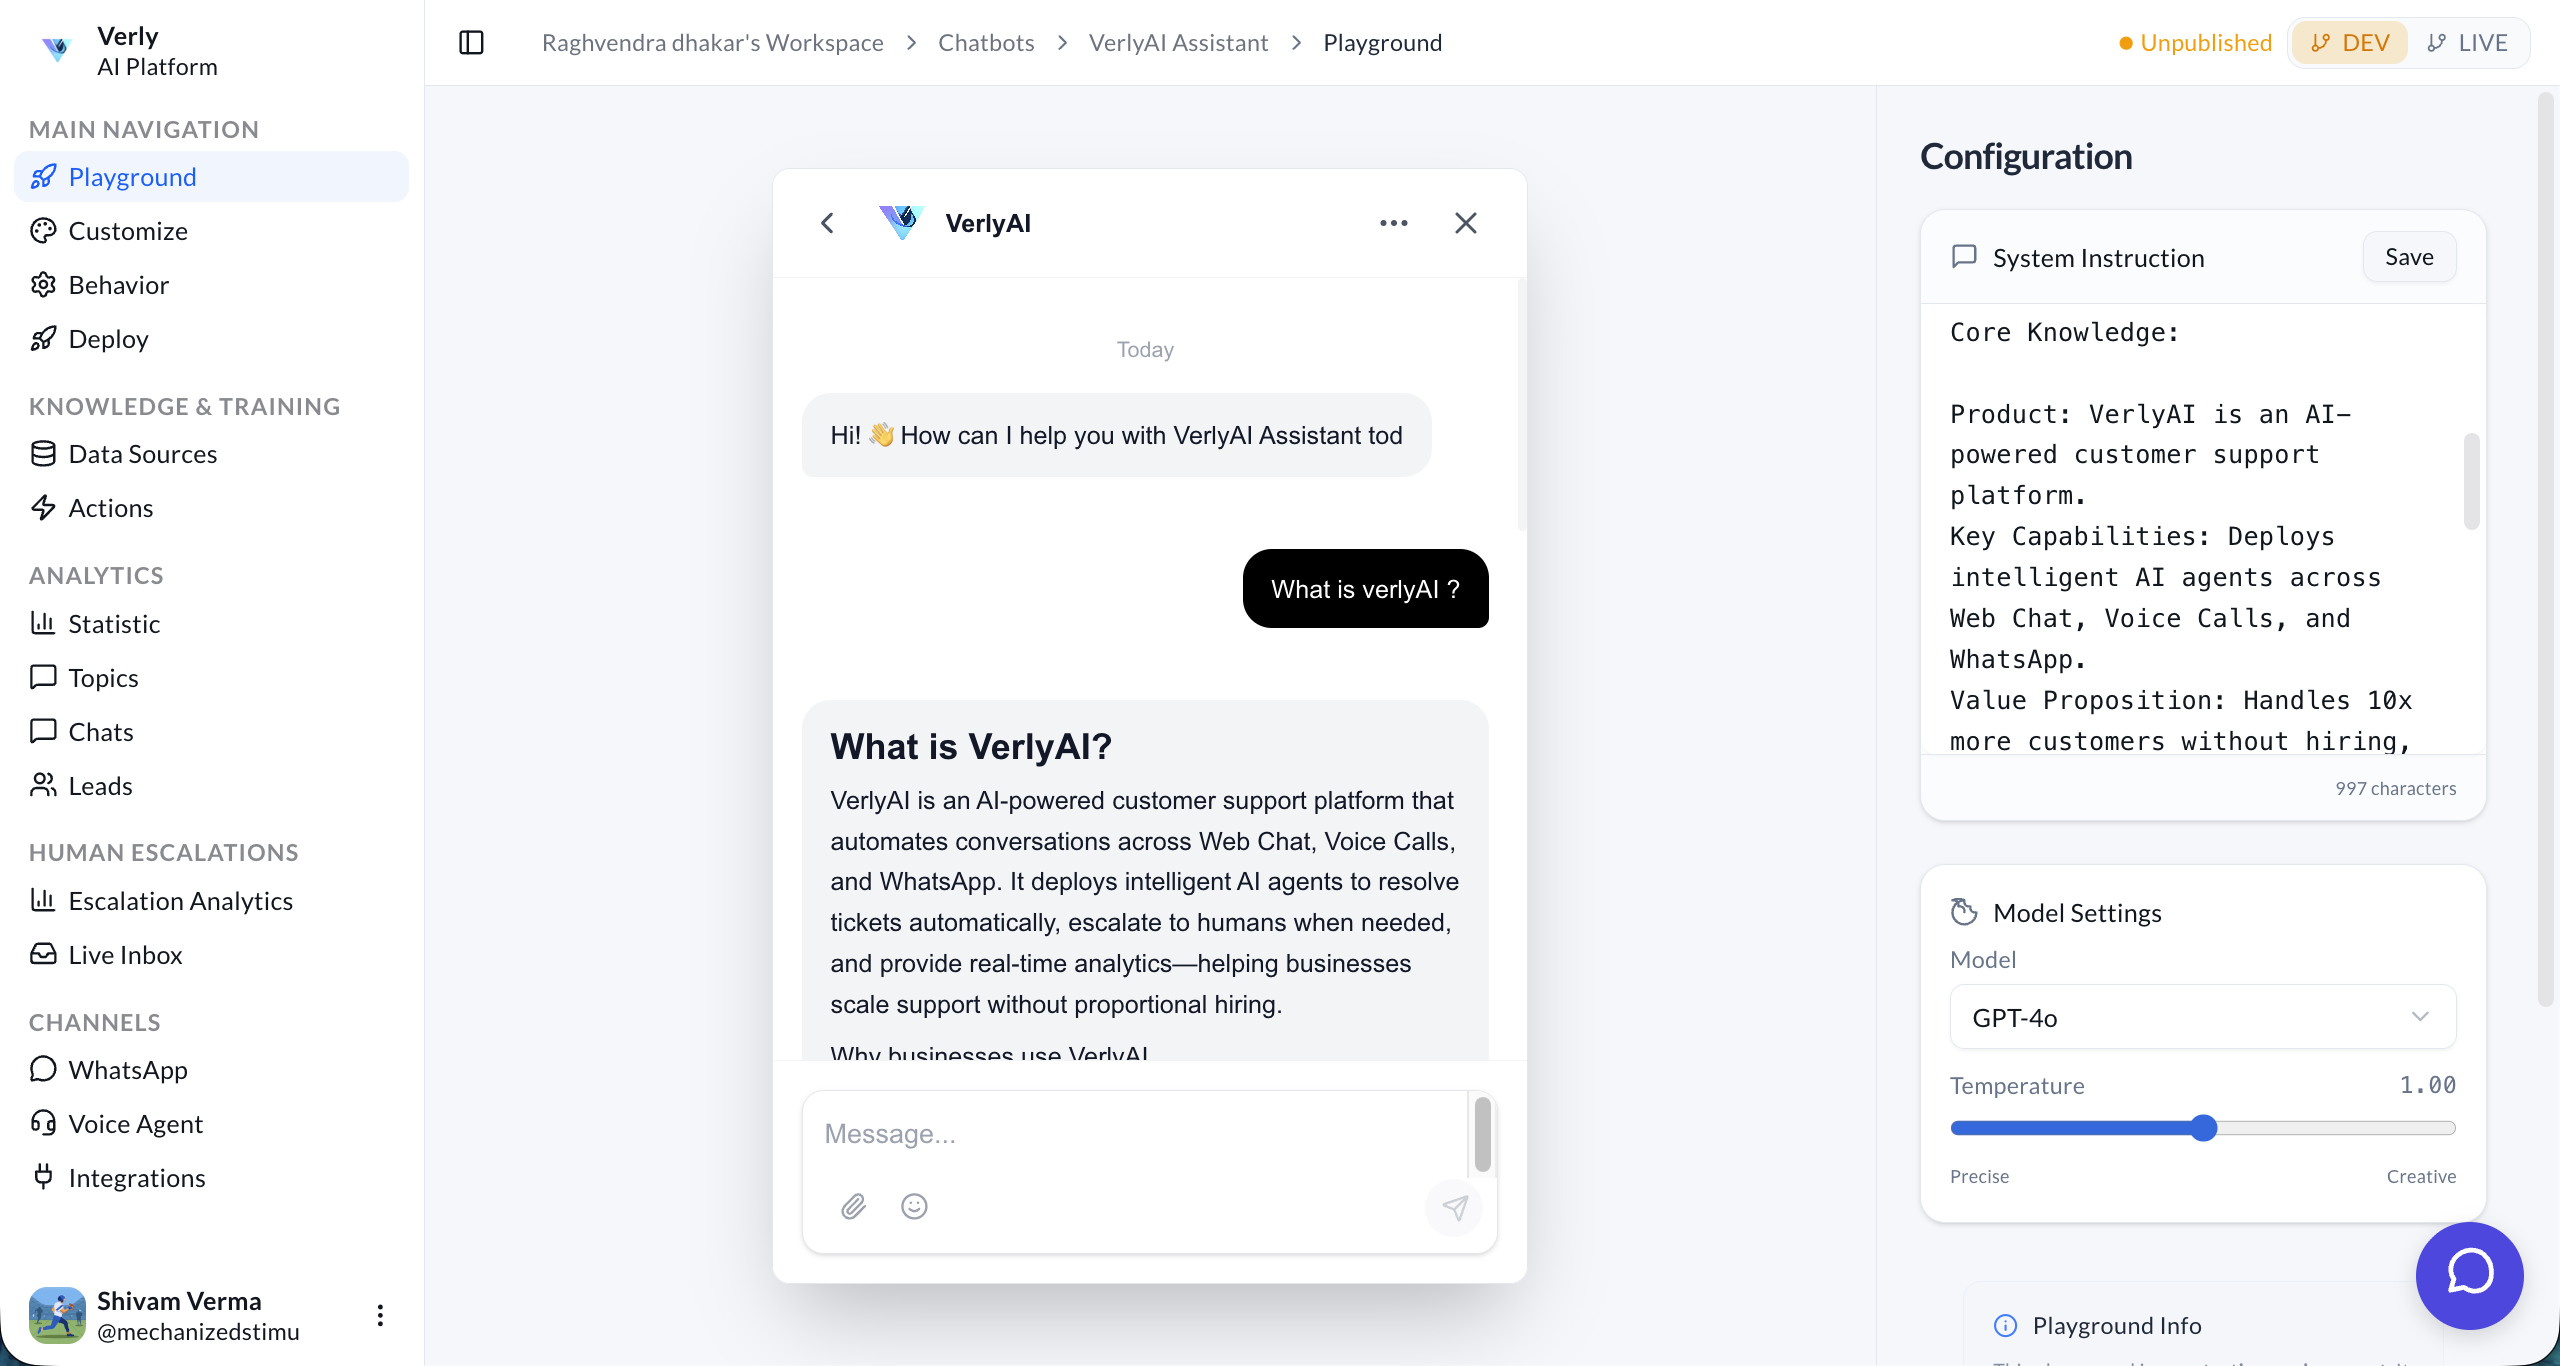
Step 3: Test in Playground
Before going live, it's crucial to verify your agent's responses in the Playground.
1. Chatbot Interface
You can interact with the chatbot directly in the dashboard to test how it responds to queries.
2. Configure Agent Behavior
To fine-tune your agent, you have several settings available on the right-hand side:
- System Prompt: Design your agent's persona and give it specific instructions on how to behave.
- Model Selection: Choose the specific AI model that powers your agent.
- Temperature: Adjust the creativity of the responses. Higher values make the agent more creative, while lower values make it more deterministic.
- Open the Playground tab.
- Ask questions like "What are your pricing plans?" or "How do I reset my password?".
- Refine your System Prompt or add more knowledge sources if the answers aren't accurate.
Step 4: Deploy Your Agent
Once you're satisfied with your agent's behavior in the Playground, it's time to publish it.
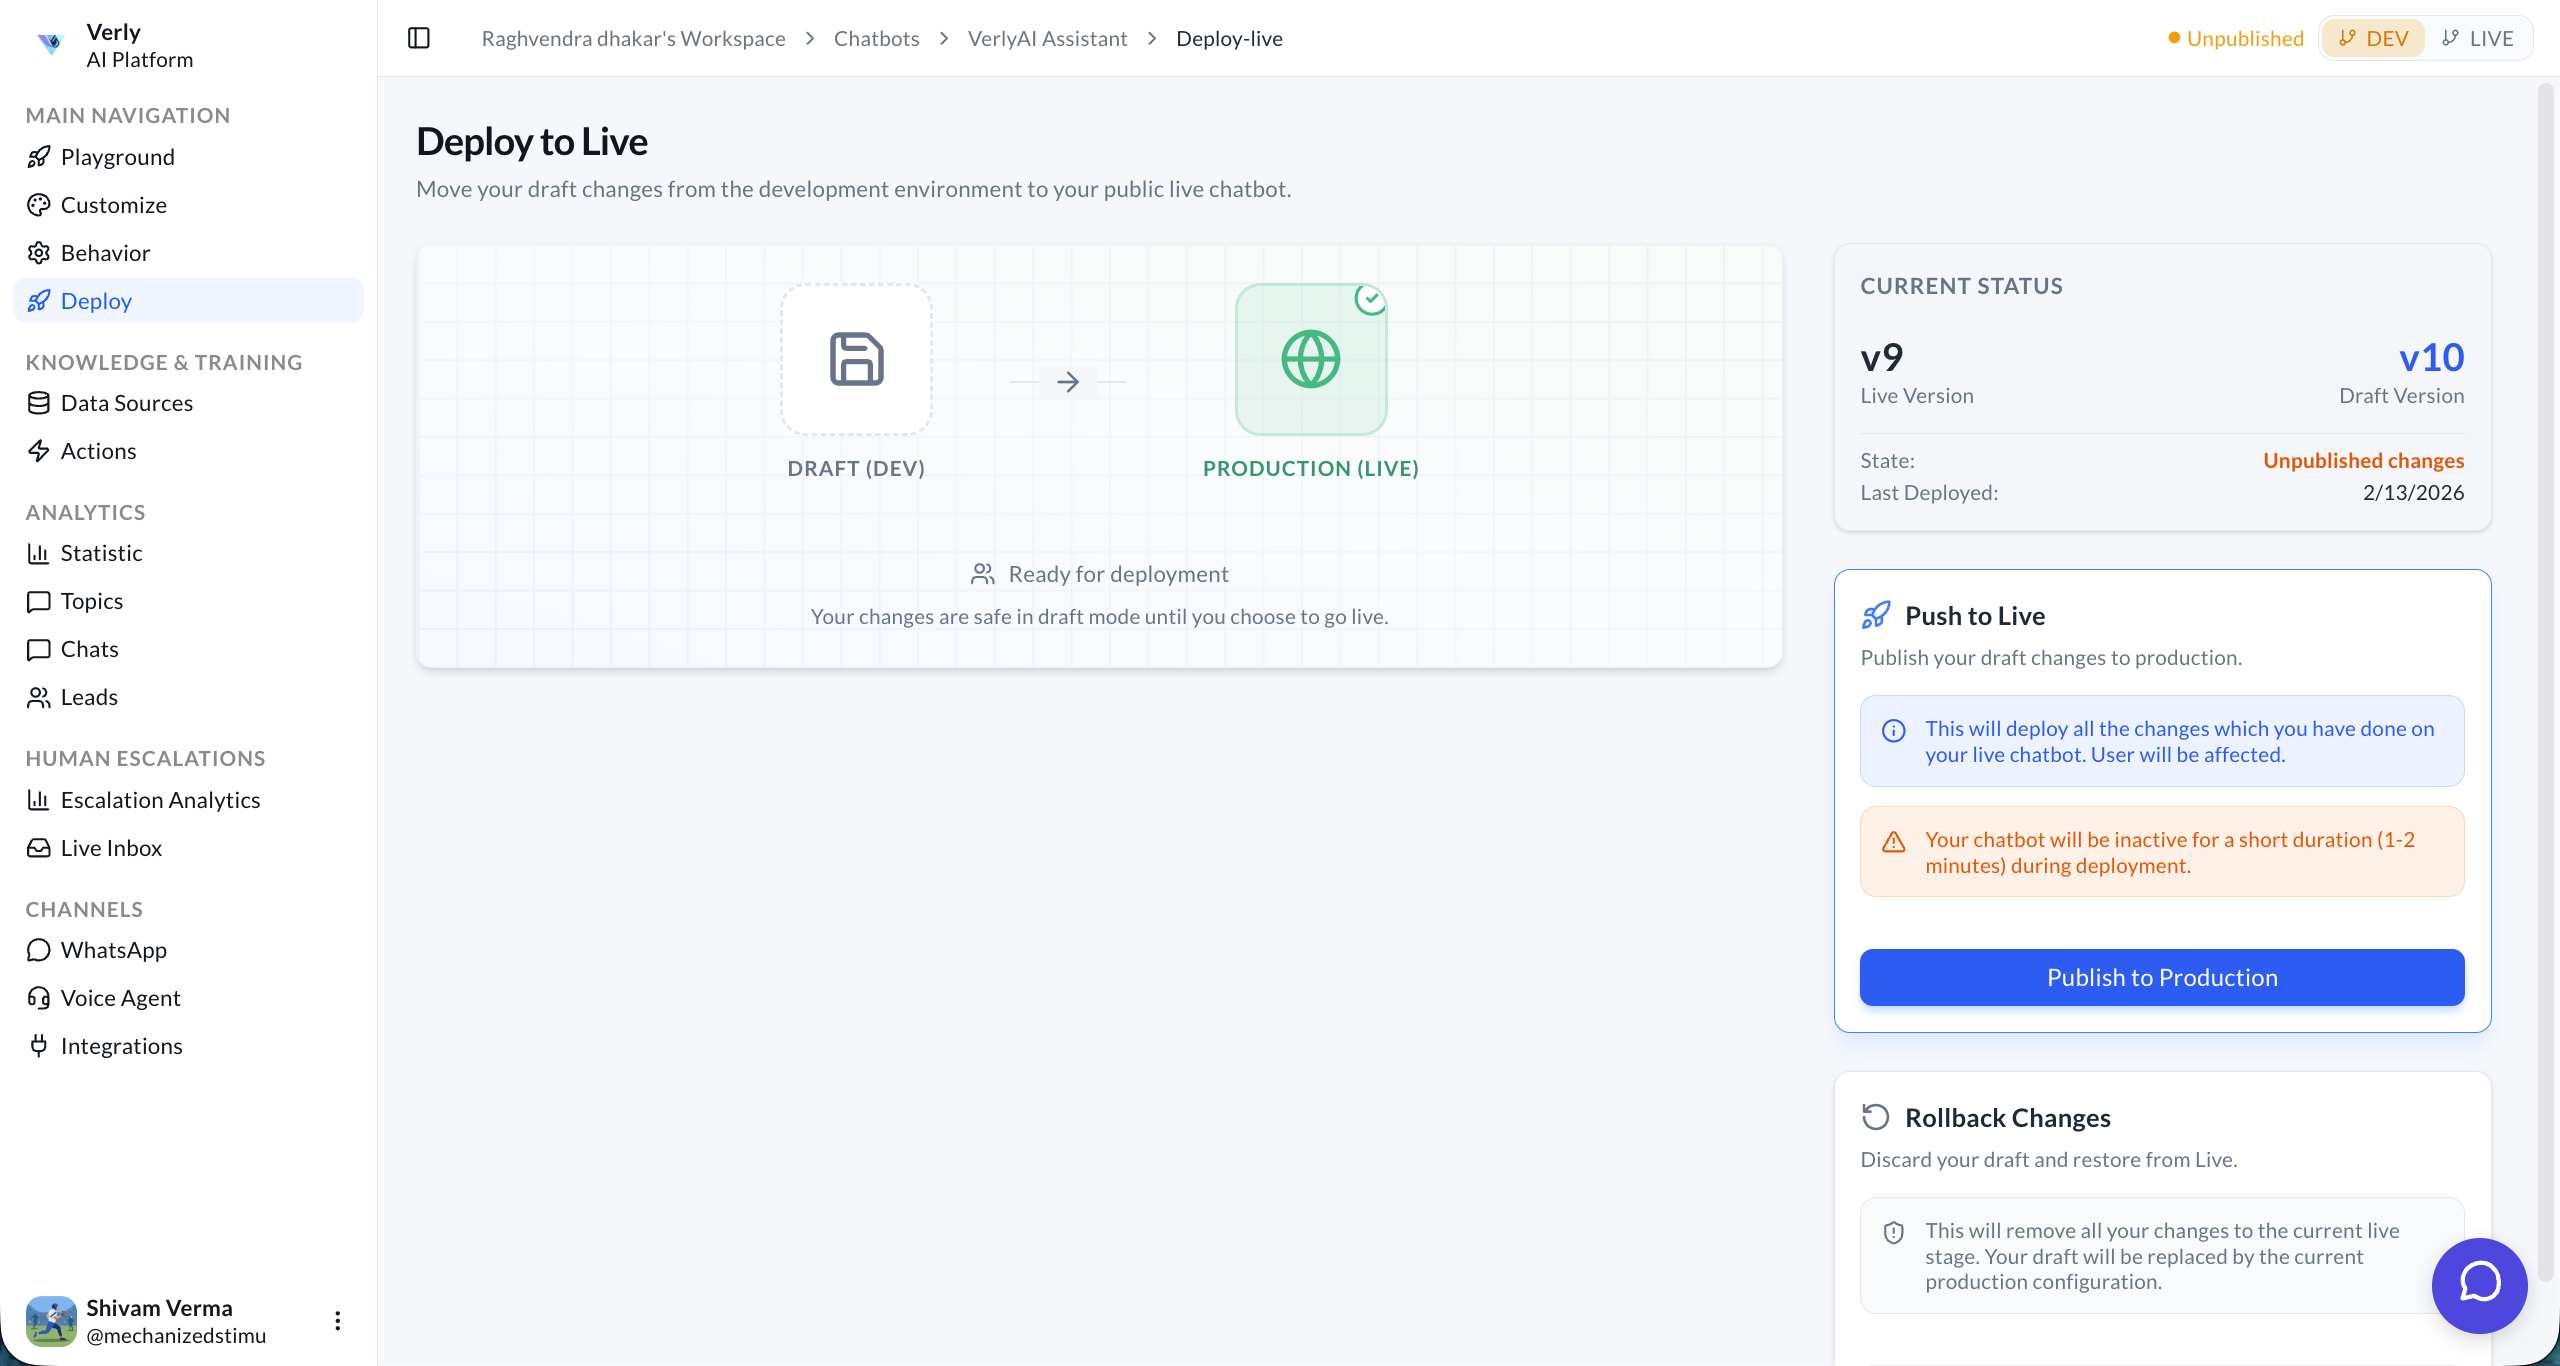
1. Push to Live
In VerlyAI, you work in a Draft (Dev) environment. Changes made here (like updating the system prompt or adding knowledge) are safe and won't affect live users until you explicitly publish them.
- Go to the Deploy tab.
- Click Publish to Production.
- Confirm the deployment.
Next Steps
Now that your agent is live, you can:
- Configure Human Handoff
- Set up Custom Tools
- Monitor Analytics